Use to setup an event.
The Event Management page is divided into several input sections:
Page Settings
section:

- Use - select one of the following:
o Page
Type Default Settings – use to
select the default Page Settings Collection for this feature. The Default Settings for each feature are set
from Page Type Manager which is listed on the Utilities Menu. When PortalProdigy is first installed, each
feature is set to inherit the Site Settings Collection.
o Other – use to select a specific Page Settings
Collection from the list box.
- Add
New button
 use to create a new Page Settings
Collection.
use to create a new Page Settings
Collection.
- Page
Manager button
 use to open Page Manager to view and edit
the selected Page Settings Collection.
use to open Page Manager to view and edit
the selected Page Settings Collection.
Relationship to Other Events section:
Provides option to relate the even to other events. This is useful when the same event is offered
on multiple dates and times. Events that
are held on multiple dates and times can be cloned to eliminate duplicate data
entry. When an event is cloned from a
parent event, individual settings may be overridden for each cloned event. Changes to the parent event are inherited by
all child events.

- Relationship
– select one of the following options:
- Independent – this is the default selection. Use when this is a one time event.
- Parent – select when this event will be used as the master
event. A “Parent” event can be
cloned to create “Child” events.
- Child – select when this event is a clone of a parent event. The Clone event feature will
automatically select this value for the cloned event.
- Parent
Event ID – this value is automatically set when the event is a
clone. When the event is a “Child”
event you may manually select a different parent event.
- View
List of Related Events button
 - click this button to displays a
list of all related events as shown below:
- click this button to displays a
list of all related events as shown below:

Event Details
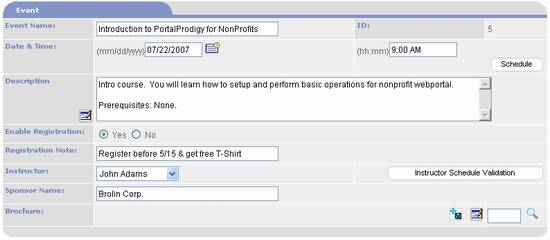
- Event Name – The
Administrator enters the name of the event in this field. It will be displayed
to visitors viewing the Events List on the public portion of the website.
- ID – this
is automatically assigned by PortalProdigy.
- Date &
Time – The Administrator enters the starting date and time of the
event in this field. It will be displayed to visitors viewing the Events
List on the public portion of the website. It will also be used by the
system to determine the event’s placement on the event calendar.
- Schedule
button
 - click to open the Event Schedule
page. Use the Events Schedule to
enter a detailed listing of the Event’s schedule of dates and times.
- click to open the Event Schedule
page. Use the Events Schedule to
enter a detailed listing of the Event’s schedule of dates and times.
- Description – The
Administrator enters the descriptive details of the event in this field.
It will be displayed to visitors viewing the Events Details after they
click on the corresponding Event Title in the Event List on the public
portion of the website.
- Enable
Registration – set to Yes to
allow online registration. Set to No to disallow online registration.
- Registration
Note – The Administrator enters notes regarding registration for the
event in this field. It will be displayed next to the registration link to
visitors viewing the Events Details.
- Instructor – when
applicable, use to specify a person’s
name. List box is populated with
all contacts that have Contact Type set to Instructor.
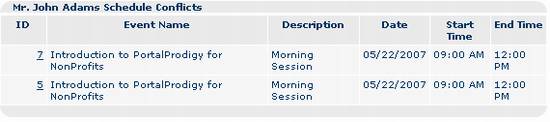
- Instructor
Schedule Validation button
 – click to open the Schedule Conflict
checker page. PortalProdigy will
check the instructor’s event schedule and display any overlapping dates
and times as shown in the example below:
– click to open the Schedule Conflict
checker page. PortalProdigy will
check the instructor’s event schedule and display any overlapping dates
and times as shown in the example below:
- Sponsor Name:
- The Administrator enters the name(s) of any event sponsors for the
event in this field. It will be displayed to visitors viewing the Events
Details.
§
Brochure
- use to attach a Brochure to the Event.
Brochures are a great tool for providing a multimedia presentation of
the product to the Customer. Customers
view the Brochure using a button in the Event Detail page. PORTALPRODIGY stores Brochures as documents
in the Document Resource Library, which allows the Brochure to be linked to
other Events and pages within your PORTALPRODIGY Website. The following options are used to attach,
edit and remove brochures from the Item:
o
 - used to view the Brochure. The Brochure will open in a new browser
window.
- used to view the Brochure. The Brochure will open in a new browser
window.
o
 - used
to upload a Brochure to the PORTALPRODIGY Document Resource Library and
automatically attach it to the Item. If
a Brochure has already been uploaded it will update the file.
- used
to upload a Brochure to the PORTALPRODIGY Document Resource Library and
automatically attach it to the Item. If
a Brochure has already been uploaded it will update the file.
o
 - used to checkout the Brochure for
editing.
- used to checkout the Brochure for
editing.
o
 - used
to create or edit an existing Brochure using the PORTALPRODIGY Document Editor.
- used
to create or edit an existing Brochure using the PORTALPRODIGY Document Editor.
o
 -
used to attach a Brochure that already exists in the Document Resource
Library. Either enter a Document ID into
the text box or click on the
-
used to attach a Brochure that already exists in the Document Resource
Library. Either enter a Document ID into
the text box or click on the  lookup icon
to use the Search For Documents feature to locate and select an existing
Brochure.
lookup icon
to use the Search For Documents feature to locate and select an existing
Brochure.
Event Location
Details
This section is used to enter values for custom fields. Custom fields are defined from Events Features
Management page. Custom fields allow you
to create additional database fields that visitors can search on to locate
events and that can be viewed by visitors.
A Custom field may also be set to be hidden from Visitors such that only
Administrators can view the field.
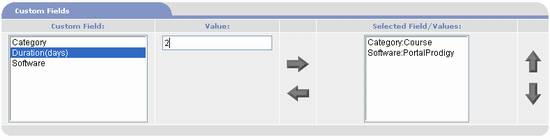
- Custom
Field – use to select one of the listed fields.
- Value
– enter a value for the selected field then click the right arrow
 to add to the Selected Field/Value
column.
to add to the Selected Field/Value
column.
- Selected
Field/Value – shows the selected field/value combinations. The display order of these fields can be
changed by selecting a field in this control and clicking either the up
 or down arrow
  to move the field up or down. To remove a field selection, select a
field then click the left arrow
to move the field up or down. To remove a field selection, select a
field then click the left arrow  to remove it.
Event Location
Details
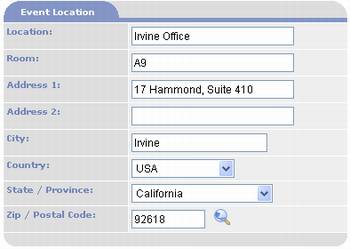
- Location – The
Administrator enters the name of the event location for the event in this
field (For example, Hilton Hotel at Paramus). It will
be displayed to visitors viewing the Events Details.
- Room – The
Administrator enters the name or number of the room where the event will
take place.
- Address 1 – The
Administrator enters the street address of the event location for the
event in this field. It will be displayed to visitors viewing the Events Details.
- Address 2 – The
Administrator enters the street address of the event location for the
event in this field. It will be displayed to visitors viewing the Events Details.
- Country, City,
State/Province, Zip/Postal Code – The Administrator enters the
country, city, state and postal code of the event location for the event
in this field. It will be displayed to visitors viewing the Events
Details.
Make Checks Payable
To section:
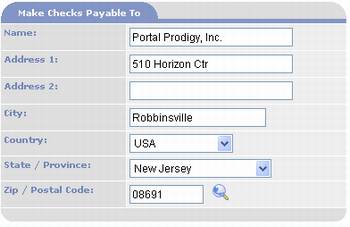
- Name – The
Administrator enters the name (payee) that payment checks should be
written to. It will be displayed to visitors viewing the Events Details.
- Address 1 – The
Administrator enters the street address of the payee address for the event
in this field. It will be displayed to visitors viewing the Events
Details.
- Address 2 – The
Administrator enters the street address of the payee address for the event
in this field. It will be displayed to visitors viewing the Events
Details.
- Country, City,
State/Province, Zip/Postal Code – The Administrator enters the
country, city, state and postal code of the payee address for the event in
this field. It will be displayed to visitors viewing the Events Details.
Accepted Payment
Methods section:
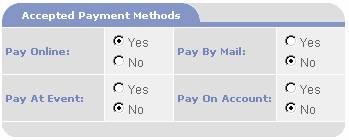
- Pay Online
Radio Button – By selecting Yes or No, the Administrator indicates
whether visitor registrants can pay online using their credit card.
- Pay By Mail
Radio Button – By selecting Yes or No, the Administrator indicates
whether visitor registrants can pay online using their credit card.
- Pay At Event
Radio Button – By selecting Yes or No, the Administrator indicates
whether visitor registrants can pay at the event.
- Pay On Account
Radio Button – FUTURE
IMPLEMENTATION
Who to Contact For
More Information section:

- Name – If
there is a personal contact available to visitors who need additional
information, the Administrator enters his/her name here.
- Phone &
Extension - If there is a personal contact available to visitors who
need additional information, the Administrator enters his/her phone number
here.
- Email – If
there is a personal contact available to visitors who need additional
information, the Administrator enters his/her email address here.
Other Options
section:
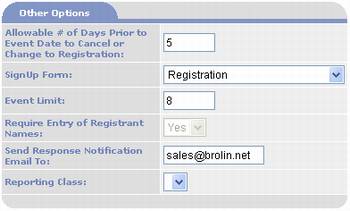
- Allowable # of
Days Prior to Event Date to Cancel or Change to Registration Field – Many
organizations allow cancellations up to a specific number of days before
an event is scheduled to occur. If
the Allow Customer to Edit
Submitted Orders radio button is selected as Yes on the Event Features
Management page, the Administrator may wish to set a number into this
field in order to prevent last minute cancellations and updates for the
specific event.
- SignUp Form
– use to select a Quick Registration form that event registrants will be
taken to when they click the Signup As New User option.
- Event Limit
Field – The Administrator enters the limit of attendees into this
field. If total registrants exceeds this limit, new registrants will not
be able to signup. Instead they will receive a message indicating the event
is sold out
- Require Entry
of Registrant Names Field – When selected as Yes, the system displays
fields to enter attendee names.
- Send Response
Notification Email To Field – If an email address is included in this
field and a Broadcast Template and Recipients list was created using
the Broadcast Feature and then selected in the Response Notification
Template field of the Events Features Management page then the email
address entered here will receive a notice each time a new registration is
entered.
- Reporting
Class Field – This field is used as a filter for reports based on
reporting classes usually set up by committee or chair responsibility (For
example, events, communications, membership, etc.). Provided Reporting
Classes were entered in the Reporting Classes Management page, a selection
list will be available here.
Registration Types
& Fees section:
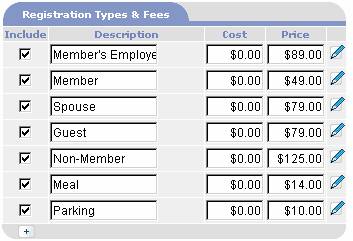
The description fields of the Registration Types and Fees
Detail are filled by default for the convenience of System Administrators. The
defaults can be changed from the Items Management page which is reached by
clicking in the Item Update Icon Link  - Logic is used to determine whether certain
items should be displayed to a logged in visitor. For example, a logged in
visitor who had membership type status would see the Member Registration Type,
the Guest Registration Type and the Member’s Employee Registration Type, if
they were active, but would not see the Non-Member selection because it would
not apply. Logic for each Registration Type can be changed by the Administrator
on the Items Management page. Items can be added by clicking on the
- Logic is used to determine whether certain
items should be displayed to a logged in visitor. For example, a logged in
visitor who had membership type status would see the Member Registration Type,
the Guest Registration Type and the Member’s Employee Registration Type, if
they were active, but would not see the Non-Member selection because it would
not apply. Logic for each Registration Type can be changed by the Administrator
on the Items Management page. Items can be added by clicking on the  below the checkboxes.
- Include
Checkbox – The Administrator can check and uncheck the boxes by
clicking on them. A checked box indicates active status, in which case a
visitor will be able to signup for the checked item when registering for
an event.
- Description
Field – The Description Field displays a purchasable item at
registration signup and can be updated to display registration types to
visitors when they register for an event on the public portion of the
website.
- Cost Field –
This field is for FUTURE IMPLEMENTATION.
- Price Field – The
Administrator enters the price of an event type in the Price Field.
- Item Update
Icon Link -
Record Details

- Created By
Field – Indicates who entered the record
- Modified By
Field - Indicates who last modified the record.
- Active Field –
The Active Field can be set to Yes or No. When set to No, the event
will no longer be displayed on the visitor (public) portion of the website.
It also will be excluded from search results on administrative pages
unless the Include deactivated records in search results box is
checked. It does not delete the
record but tags the record so it will be filtered from display.

- Expires Date Field
– The Expires Date Field provide for the input of a date, after which
the event will no longer be displayed on the visitor (public) portion of
the website. It does not delete the record but tags the record so it will
be filtered from display.
- Chapter ID
Field – Indicates the chapter of the user who entered the event
record. This field is applicable on multi-chapter versions of PORTALPRODIGY.
- Topic Field – The
Topics Field contains a selection list based on entries made on the Events
Topics Management pages. Topics determines which events are grouped
together in the Events List on the public portion of the website.
- Level Field – The
Level Field is applicable to multi-chapter synchronous installations of
PORTALPRODIGY where levels, such as National, Regional, State and Local
are4 used to filter the display of records.
- Private Fields
– The Private Field can be set to Yes
or No. Selecting No indicates that the event record
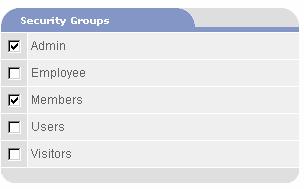
may be displayed to all visitors. Selecting YES indicates that only visitors with appropriate privileges
may view the event record and causes the Security Groups selection box to
be displayed at the bottom of the Events Management page. Clicking to
check the corresponding check box(es) permits specified group members to
view the discussion record on the public portion of the website.
Links
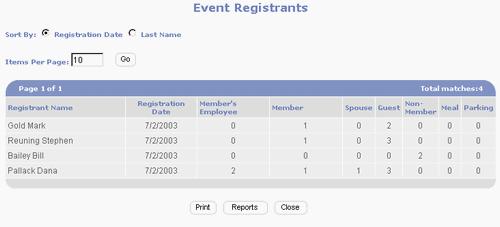
Clicking on the View Event Orders
link accesses the Event Registrant page which reports each individual
registration order including the number of attendees by Registration Type.
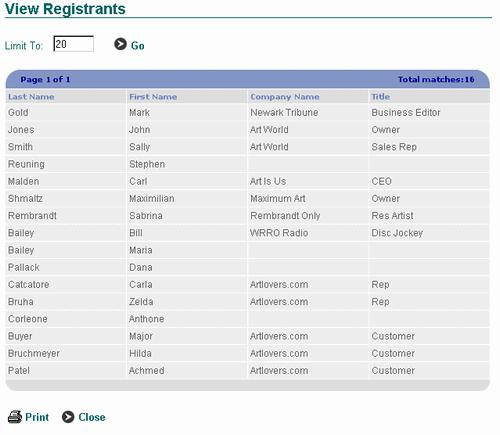
Clicking on the View Event
Registrants link accesses the View Registrants page which lists all attendees
registered for an event.
Options Buttons:

|

|
Clicking on the Process Fulfillment button automatically
fulfills all the event orders processing the purchase data to the general
ledger and closing the ability to update the order and purchase record. If
the Post Orders Radio button is
selected on the Events Features Management setup page, orders will not post
until the button is
clicked.
|
|

|
Saves the data entered into the Event Record fields
|
|

|
Creates a new Event record
by copying the open Event record.
|
|

|
Deletes the Event Record.
|
|

|
Prints the website page to the user’s local printer.
|
|

|
Accesses the Report Menu
|
|

|
Causes a notice to be broadcast based on the Broadcast Template
and Recipients list created using the Broadcast Feature and then selected in
the Auto Broadcast field of the Events
Features Management page
|
|

|
Closes the page without saving or updating values.
|
|

|
Closes the page and prompts the visitor to save the data.
|


