This tutorial describes how to add Product Items to your
Shopping Cart.
Pre-requisite:You
must first define Product Categories and Product Items.
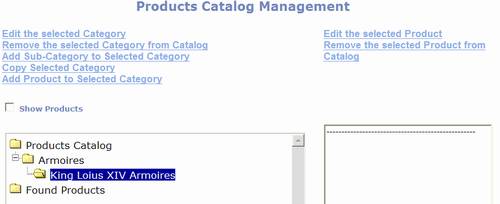
From the Site Administration Menu option, clickto display the Product Catalog
Management page.
Highlight the Category you want to assign Product
Items to and click Add Product to Selected Category.This will display the Product Search
page.
From here there are three steps to assigning Product
Items to a Category:
Step 1 – Use Product Search to display Products.
Step 2 – Select (check) Products to be assigned.
Step 3 – Update Category
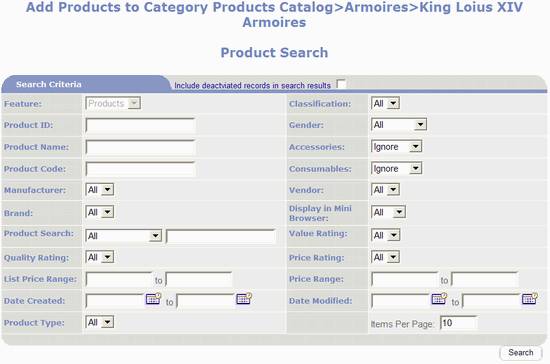
Use the Product Search feature to enter search
criteria.See the section on
Product Searches for detailed instructions how to perform search.
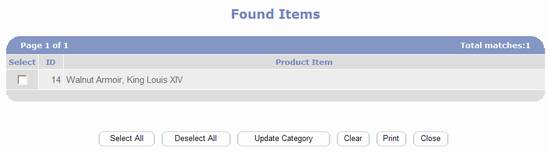
Click to display Found Items as shown below.
You can manually check each Item to include or you
can click .
After clicking Select All you can manually uncheck
Items to not include.
You may repeat the Search and Selection process to
select additional Items using different criteria.Portal Prodigy will keep track of the
Items you have selected.
When finished selecting Items, clickto assign all selected Items to the
Category.
PORTALPRODIGY will return to the Product Catalog
Management page.The selected Items
are now posted in your Shopping Catalog
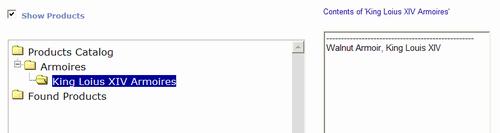
To view the Items you have assigned to the Category,
check .The Product Items for the selected
Category are displayed in the left side listing control.
You can individually remove Items from the Category
by highlighting the Item and clicking Remove the Selected Product from
Catalog.