Request Form Management is used to
define a data entry form for the selected Request Type. The Request Form Management page contains two
sections. The first section, Request Form
Header, is used to define a title and instructions for the form. The second section, Question Details, is used
to define one or more questions/fields to be included on the form.
Page Settings
section:
This section is not displayed initially. It is displayed after you save your form.

- Use - select one of the following:
o Page
Type Default Settings – use to
select the default Page Settings Collection for this feature. The Default Settings for each feature are set
from Page Type Manager which is listed on the Utilities Menu. When PortalProdigy is first installed, each
feature is set to inherit the Site Settings Collection.
o Other – use to select a specific Page Settings
Collection from the list box.
- Add
New button
 use to create a new Page Settings
Collection.
use to create a new Page Settings
Collection.
- Page
Manager button
 use to open Page Manager to view and edit
the selected Page Settings Collection.
use to open Page Manager to view and edit
the selected Page Settings Collection.
Request Form Header section:
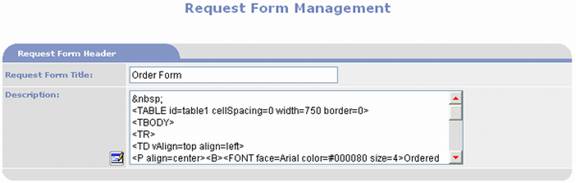
§
Request Form Title: used to give the form a title which will be
displayed on the Request entry page.
§
Description: used to place instructions
or other information the Request entry page.
Click on  to use the PORTALPRODIGY Document Editor.
Question Details section:
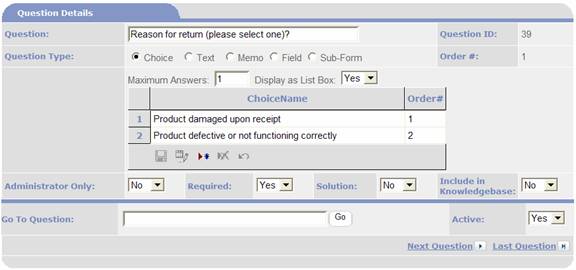
§
Question:
used to enter the field label or questions such as “Name:”, “Phone
Number:”, “Please describe your requirements:”, “How many salespeople does your
firm have?”, etc. Allows text value of
up to 255 characters.
§
Question Type: used to select a type of field/question. The Question Type determines the type of data
and input method that will be used. Note
that each Question Type has different options that are explained below.
o Choice
- used to provide the user with multiple choices as selections. When Choice is selected as the Question Type,
a grid control is displayed as shown in the screen picture below. Click the  Add New Record icon to add a Choice. Click
  Save Current Record icon when finished
entering the Choice. Repeat for
additional choices/
Save Current Record icon when finished
entering the Choice. Repeat for
additional choices/
§
Choice Name: Enter the value.
§
Order#: used to control the order of the
Choices. Enter as integer.
o Maximum
Answers - This is the maximum number of selections the user is
allowed. It is entered as an
integer. If you want the user to select
all that apply then set the value to the total number of choices, e.g. if there
are 3 choices and you want to allow the user to select up to three of them,
then set to Maximum Answers = 3. This
will display the choices as checkboxes on the form. If you want the user to select only one
choice then set to 1. When Maximum
Answers = 1, it will display the choices as radio buttons. When set to more than one, it will display
the choices as checkboxes. If you would
rather have the choices displayed in a list box then set Display as List Box to
“Yes”. List box is appropriate when
Maximum Answers = 1.
o Text
- When Text is selected select you will be given the choices to select a
Data Format for the text. The choices
are “Text”, “Date”, “Number”, and “Dollars”.
This will display a text box on your form and format the value as
specified.
o Memo
- This will display a memo field on your form.
o Field
- When Field is selected select a field name from the list box. This will display a text box on your form and
format the value according to the selected field’s rules. Use this Question Type when you want to link
data in your form to PortalProdigy data fields.
If in Request Management you set Create Contact Record to “Yes” you will
need to add Questions with Question Type = “Field” for each piece of Contact
information you want to collect such as Contact’s Name, Company Name, Email Address,
and Phone Number.
o Sub-Form
- Use this option to insert a sub-form within the main request entry form. Use sub-forms to collect multiple rows of
information. The sub-form questions/fields are formatted as columns and the
data is entered in rows with the ability to insert as many rows as needed. E.g. a Sub-Form could be included to request
a quote on multiple items/products. Set
Default # of Rows to 1 or higher. This
determines the number of blank rows that are displayed on the Sub-Form. If your
customers typically request information for 3 items at a time, then set this to
3. The system will insert a button in
the Sub-Form that will allow customers to add additional rows. Click on the Sub-Form link. This will open Sub-Form Builder in new
window. It works the same way as Request
Form Management. When finished building
your Sub-Form, click Close button to return to Request Form Management.
§
Administrator Only: Set Administrator Only to “No” for all
questions/fields that you want the customer to see on their entry form. Set to “Yes” for all questions/fields that
you want hidden from the customer but visible to administrators.
§
Required:
Set Required to “Yes” to make a response to the question/field
mandatory. Set to “No” to make a
response optional.
§
Solution:
Set Solution to “Yes” to not include the question/field on the customer
entry form, but to include it on the status form that is accessible to the
customer. E.g. you may want a field for
Quoted Price that your sales staff enters after the customer has submitted their
request. Such a field would not be
appropriate on the original entry form.
§
Include in Knowledgebase: Set Include in Knowledgebase to “Yes” if you
want customers to be able to perform public search for the Request. Typically this is set to “No” for Product and
Sales Information requests.
§
Go To Question: use to enter text to search for a
question. If no match is found it will
display the first question. If a match
is found it will display the matching question.
This is a useful tool for quickly finding questions for editing,
eliminating need to scroll through them one at a time.
§
Active:
yes/no list box. By default it is
set to “Yes”. Set to “No” to deactivate
the record. Deactivated questions will
not be displayed on Request Entry for new requests but remain in database to
store the information entered in Requests prior to deactivation.
|

|
Saves the data and continue working on the page.
|
|
|
Adds a new question.
|
|

|
Deletes the currently displayed question. PORTALPRODIGY will prompt to confirm
deletion of the question. Select OK to
confirm the deletion or CANCEL to abort the deletion.
|
|

|
Deletes the entire Request Form.
PORTALPRODIGY will prompt to confirm deletion of the form. Select OK to confirm the deletion or CANCEL
to abort the deletion.
|
|

|
Displays a list of the questions and for each question lists each
response (entered value).
|
|
|
Opens Question Sort Order Management page which lists all
questions and provides easy method to change their sort order.
|
|

|
Opens Reports page where you can select and print reports.
|
|

|
Used to close the page.
PORTALPRODIGY will prompt to save changes. OK response saves changes, closes page, and
returns to previous page. CANCEL
response discards all entries and edits to the current page (same as Cancel
button).
|


