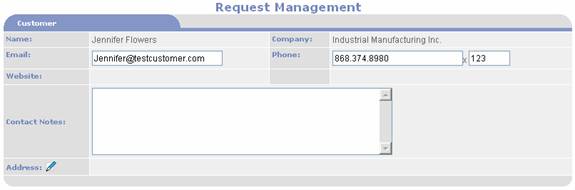
Contact
Notes: use to enter notes that the requestor will not see.
Address:
by default the address is hidden. Click on the icon to view the requestor’s address.
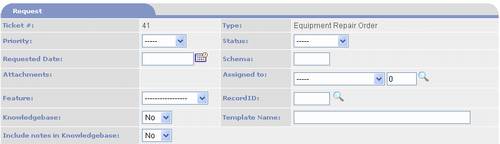
Request section:
The upper portion of this section contains standard fields
shared by all Request Types.This is followed
by the unique fields defined using Form Builder for the specific Request Type.
Ticket
#:the Request ID which is
automatically assigned.
Type:
the Request Type.
Priority:
use to assign a priority to the Request.
Status:
use to assign a status to the Request.
Requested
Date: use to enter the date the requestor needsa response to their request.
Schema:
this is for a planned feature that has not been implemented yet.
Attachments:
if the Request Type is configured to allow attachments, the attachment
options are displayed here.These
options allow you to attach documents and files to the Request.
Assigned
To: creates an Assignment Task and sends and email notification to the
specified person.
Feature:relates the Request to a specific
feature.E.g. for an RMA request
you may want to set Feature to “Products” and select a Product Item using
the Record ID field.Request Types
that are set up for a specific Feature such as “RFQ from Cart” will auto
set this field.No value is
required in this field.
Record
ID: used when a Feature has been specified.Either enter the ID or use the Lookup icon to search and select a record.
Knowledgebase:
set to “Yes” to include the Request record in the Help Desk Knowledgebase;
otherwise leave it set to “No” to exclude it.Only records set to “Yes” can be searched
on and retrieved in the Knowledgebase.Notes are excluded from Knowledgebase unless you set the Include
notes in Knowledgebase field to “Yes”.
Template
Name: normally this field should be left blank.It is used to create a Task Template
that will copy pre-defined tasks to new request records.To create a template, enter a name in
this field and when the Request is saved, the Template will be created and
listed in Task Template field in Request Types Management.
Include
notes in Knowledgebase:set to
“Yes” to include the Request record’s notes in the Help Desk
Knowledgebase; otherwise leave it set to “No” to exclude them.
Work Order section:
Work
Order #: click on the Work Order # to open the Work Order in Work
Order Management.
Approval
Date: the date the Work Order is approved by the customer.
Description:
the description of the scope of work that was entered in the Work
Order.
Closed section:
Closed
to Request ID:used when you
want to close the Request in order to consolidate it with another
Request.Enter the Request ID of
the other Request that want to become the open Request and enter a Closed
Date.
Closed
Date:used to close the Request
because it has been completed.Click on the the icon for to auto insert today’s date. You may also click on the date lookup icon to select a date from the pop-up calendar
or manually type in the date.
Option buttons:
Saves the data and continue working on the page. If an Assigned
to person was entered or changed, saving the page will create an assignment
task and send email notification.
Prints the website page to the user’s local printer.
Close the page and discard all entries and edits.
Opens Request Tasks page in new browser Window displaying
list of all Tasks related to the Request. Each Task can be clicked on to open
it in Task Management page where it can be edited, time logged, and notes
attached.New Tasks can also be added
from Task Management.
Opens Search Help Desk Knowledgebase page in new browser
Window.Used to search Requests and
view requests.This is the same page
that visitors see when they user the Search Help Desk Knowledgebase feature.
Used to close the page.PORTALPRODIGY will prompt to save changes.OK response saves changes, closes page, and
returns to previous page.CANCEL
response discards all entries and edits (same as Cancel button).