This tutorial describes how to enter a check payment using
Payment Entry. Note that payments can
also be entered from Order Management and via the Administrator Entry feature
in the visitor user interface.
Payment Entry Step 1:
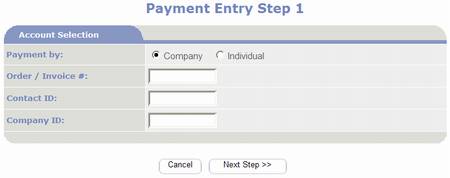
The purpose of the first step is
identify the customer, if possible, or to inform the system whether to lookup a
company record or a contact (individual) record.
First select whether the Payment
is being made by a Company or Individual.
Often clients will write their
account or order number on their checks or they will include a copy of their
invoice with their payment. If you have
either: the Order/Invoice#, Contact ID, or Company ID, enter it; otherwise
leave these fields blank.
Next, click  button to proceed to the next step of the
payment entry process. The next step is
dependent on the information entered in step 1.
If either Order/Invoice#, Contact ID, or Company ID are entered and
found; the Search for Contacts/Companies step is skipped.
button to proceed to the next step of the
payment entry process. The next step is
dependent on the information entered in step 1.
If either Order/Invoice#, Contact ID, or Company ID are entered and
found; the Search for Contacts/Companies step is skipped.
Search for
Companies (Optional):
This step occurs when you set Step
1: Payment By to Company. The purpose of this step is to identify the
payee in your Companies database.
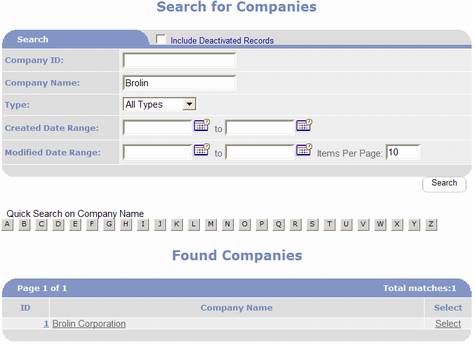
Enter search criteria such as the
company name and click  .
.
If you identify the correct
company in the Found Companies results, click the corresponding Select option
(on same row as Company).
If you need to view more information
about the company in order to identify it, click on the company name. This will display the Companies Management
page for the corresponding company. When
finished viewing the company record click on the  button; this will return you to the Search for
Companies page with the Found Companies where you can select the company,
select another company, or modify your search criteria and click again.
button; this will return you to the Search for
Companies page with the Found Companies where you can select the company,
select another company, or modify your search criteria and click again.
Once you have selected a company,
skip to Payment Entry Step 2.
Search for
Contacts (Optional):
This step occurs when you set Step 1: Payment By to Individual. The purpose of this step is to identify the
payee in your Contacts database.
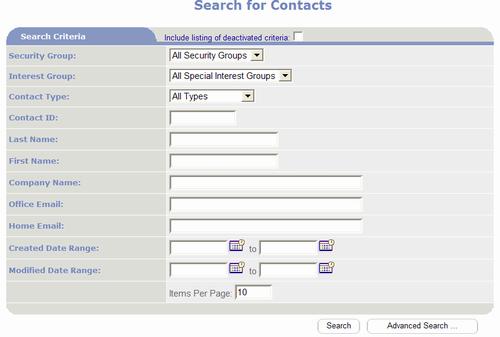

Enter search criteria such as the
Last Name and First Name, then click .
If you identify the correct
contact in the Found Contacts results, click the corresponding Select option
(on same row as Contact).
If you need to view more
information about the contact in order to identify it, click on the contact
name. This will display the Contact
Management page for the corresponding contact.
When finished viewing the contact record click on the button; this will return you to the Search for
Contacts page with the Found Contacts where you can select the contact, select
another contact, or modify your search criteria and click again.
Once you have selected a contact,
skip to Payment Entry Step 2.
Payment Entry Step 2:
This step involves entering the
details about the payment.
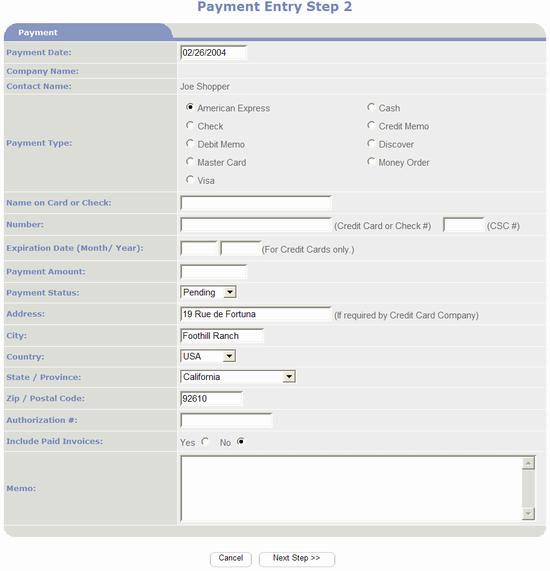
The payment date defaults to the
current date. You may enter a different
date such as the actual date the payment was received.
Select the applicable payment
type, Check or Cash.
If it is a check enter the name
printed on the check.
Unless you have a separate check
authorization process, set Payment Status to Approved.
Enter the dollar amount of the
payment.
The payment address will default
to the customer’s billing address. You
may change this to enter the address printed on the check.
Click button to proceed to the payment distribution
process where you apply the payment to orders/invoices. See the tutorial Apply a Payment to Orders
(Payment Distribution) for instructions on completing the credit card payment
entry process.


